How to do Netgear Extender Setup Using Netgear installation assistant?
Netgear Installation Assistant is a program that allows you to install Netgear products on your computer
The installation assistant makes it simple to set up a Netgear range extender.
Here’s how to use the installation wizard to set up a Netgear WiFi extender:
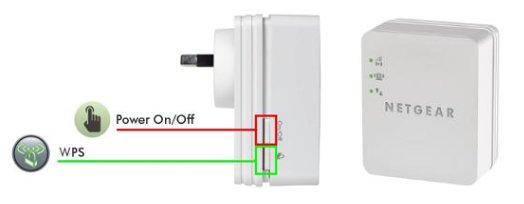
- Connect the extender to an electrical outlet.
- Connect the extender to your router.
- Open a web browser.
- In the browser’s address bar, type www.mywifiext.net or http://192.168.1.250.
The Netgear extender setup wizard appears.
- Select NEW EXTENDER SETUP from the drop-down menu.
- Fill out the fields on the setup page and press the NEXT button.
- Select the WiFi network you want to extend from your router and press the NEXT button.
Clear the 2.4 GHz WiFi Networks or the 5 GHz WiFi Networks checkboxes if you do not want to extend both WiFi bands.
- Enter the router’s existing WiFi network password in the Password (Network Key) field and click the NEXT button.
- Using the username and password, connect your WiFi-enabled device to the new extender’s Netgear Ext SSID.
- Before clicking the CONTINUE button, ensure that your WiFi-enabled device is successfully connected.
- Press the CONTINUE button.
- Press the NEXT button.
The registration page is shown.
- Finish the Netgear WiFi extender setup by filling out the registration fields and clicking the FINISH button.
That’s how to use the installation assistant to set up a Netgear extender. Connect all of your devices to the Netgear Ext SSID and enjoy a continuous internet connection throughout your home.
Netgear Extender Setup
Netgear is the most trusted brand in the world when it comes to WiFi Range Extenders. Extenders are available in a variety of models, including the Netgear EX7000 AC1900, EX3110 AC750, and WN3000RP N300. Due to dead zones, most users are unable to access the internet throughout their home or office. These are the locations where users have poor or no connectivity. Users must perform Netgear Extender Setup to convert such dead zones into fun zones. After completing the Netgear range extender setup, you will be able to enjoy a trouble-free internet connection in every room of your home.
New Extender Setup is the best way to keep all of your smart devices connected to the internet, including computers, gaming devices, mobile devices, laptops, and more. To begin Netgear Extender Setup, you must first login to the Netgear Ext SSID.
However, most users are unaware of how to set up a Netgear WiFi extender. And this is where our experts can help you if you ever run into a problem. From resolving issues with your new extender setup to extender configuration issues, we are here for you 24 hours a day, 7 days a week. We offer dependable, professional troubleshooting with a client satisfaction rate of 100 percent and a resolution rate of 99 percent.
No matter what brand or model you have, our experts can provide you with the best solution for new extender setup to help you connect, troubleshoot, set up, manage, and configure your device. We understand the value of your money, efforts, and time, so we provide the most personalised, practical, and affordable Netgear Ext (SSID) login solutions in a timely manner with dependable assistance, ensuring you never face the same problems again. Contact our seasoned experts to learn how to set up a Netgear extender without a hitch.
Netgear Extender Setup Wizard has been updated
Mywifiext.net is an important part of the Netgear Extender Setup process. Launch an internet browser and navigate to the New Extender Setup Wizard to install and configure an extender. This website requires a username and password to access. Fill in the required login info and continue with the setup process. Following that, the Netgear Genie Smart Setup wizard will appear. This wizard guides you through the process of configuring and installing an extender step by step. Follow them carefully to get the WiFi Extender up and running in a matter of seconds via http://mywifiext-local.
Not only is the web address used for setup, but it is also used to access the Netgear WiFi extender settings. However, there are times when the URL does not display any setup page; instead, you see a website with a normal page or an error on the page. The error appears because you are not connected to the Netgear ext (SSID) or because your WiFi extender is not connected to your main network.
Check your network cables to ensure they are properly connected to your WiFi Modem. Check to see if your modem is working properly. All of the lights (at least four of them) are on. If everything is fine, try turning off and on the modem once more, and then reconnect your extender.
When you connect to the network, the web-based setup page will appear. If you do not see the page on your screen, you should check your network.
You can also try logging in to your Netgear extender using the IP address instead of the default web URL. If your range extender has green lights, it means it is turned on and operational.